Pages

Wednesday, 6 June 2012

Painting Over Blemishes on Doll Clothes

   Hello, all!
     I don't know if any of you guys have ever bought a second-hand figure, but, is it just me, or was the previous owner always an idiot? ... more on that in a minute...

     Today I will be discussing how to cover up blemishes on doll clothes using acrylic paint.
     It may sound weird that I am suggesting that you paint your dolls' real fabric clothing, but, with a little tact, it works amazingly well.

     Back to my beef from earlier... Pretty much all of my "used" figures had some kind of stupid problem when they arrived. The stupidest was RAH Edward Elric, whose previous owner had thought it was a good idea to wash his clothes with ordinary washing powder. I mean, I would never want to wash those clothes EVER (the edges of his coat have wire in them!) but with washing powder? No! No! Wrong!
     The results are that his black shirt, with its lovely white edging, has bled and the lovely white edging is now a sort of off-burgundy, at its worst around the collar:
One side of the collar is stained a dark colour.
     Here's a closeup, in case you didn't see it the first time:
Oh, the horror...
     The reason that only one side looks awful in these pictures is because I have, in fact, already painted over the other side some time earlier. As you can see, the paint makes a really big difference.

     All in all, this is a pretty simple process, but there are a couple of things to keep in mind...

  •      I wouldn't recommend this for every doll-garment. It's only going to work if the fabric is fairly thick, because acrylic paint is strong stuff and it will not blend in with dainty weaves.
  •     Don't try this on any kind of stretchy fabric, since the paint will crack when the fabric stretches.
  •     The colour of the fabric could have an impact on whether or not this is a success. Black or white will be the easiest to paint over since you won't have to mix the paint yourself. With any other colour, some mixing will almost certainly be required (unless you're lucky enough to have paint the exact shade of chartreuse as your botched garment). If you do find yourself mixing paint, just be aware that acrylic usually dries a slightly different tone to how it is when wet.
  •     Acrylic paint is waterproof once it's dry. If you make a mistake, wash it off as soon as possible. Plain water should do this fine. If you're worried that you won't be able to paint the area you're working on without accidentally getting paint in places where you shouldn't, put some masking tape along the edge so that if you make a mistake, it's not the end of the world.
  •     Let's face it: this is not going to work for large areas. Small blemishes only.
  •     If you're not sure about whether the paint will work or not, dab a tiny bit of paint on the inside of a hem or somewhere you can't see to test it out before you start working.
     OK, now to start.
     This is really fine work, so I'm going to use a really tiny brush.
     Since my paint is a brighter white than Edward's shirt, I'll water it down a little bit before applying. This means that the paint will a) soak into the material a little, maintaining the texture of the fabric better, and b) not be so bright.
     To dilute the paint, I just put a little paint on a bit of paper, get some water on my brush and mix the paint/water together on the paper. The paint should be nice and runny.
Sorry the mixed paint is hard to see – white paint on white paper...
     Now I just get a little bit of the diluted paint on my brush and carefully apply it all over the blemish. If you want to fade the edges out so the painted area isn't so obvious, make a gradient by diluting the paint more and more as you go.

     ... Done!
     This job is simple once you actually start doing it.
     Here's the finished product:
     ... and another closeup of the collar:
It's not perfect, but it's a huge improvement.
     For something like this collar, where the area was small, the fabric was thick and the colour was white, the paint has done a really good job of covering up the dye.

     Hmmm, this post seems to have come to an end already!
     Good luck with your repairs!
     Cheers! Sparkey.


Tuesday, 5 June 2012

A Few Notes on Yesterday's Post...

   Hello, all!
     Turns out, that glue I used on Roy's neck takes a bit longer to set than I thought. I was posing him last night when I suddenly felt this sort of wobbly sensation on his neck, but a minute later it was gone and his neck was back to "slightly spongy".
     The joint sort of half-broke and then re-set itself...
     The glue still isn't dry, even after 48 hours >__<
     Back in the cupboard you go, Roy. See you in a few days.
     How frustrating!
     Still, considering that I could pose and re-pose Roy's neck a bunch of times even when the glue wasn't set, it just shows that drilling and pinning is a good method... and that this glue is weird. It's one of those flammable, poisonous-vapour producing ones which dries to this slightly weird, springy stuff...

    Official Apology to Barbie....
     I was contacted last night by Barbie, via the "Diversity Barbies Guild", regarding the depiction of Barbies in yesterday's post.
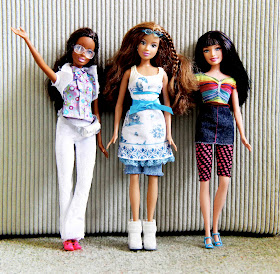
Members of the Diversity Barbies Guild
     Barbie wishes me to issue the following statement on her behalf:
     Barbies are not just a bunch of skanky, airheaded, fashion-obsessed ninnies. This outdated stereotype is inappropriate when you consider the wide selection of Barbies available in the present day. In the 21st century, Barbie dolls are professionals like doctors, vets, beauticians, fashion designers, mermaids and more. It was mean to take pictures of Barbie during a private moment – she can't be blamed for her actions because "Roy is so pretty. He is so fine."
Barbie is not only a distinguished fashion idol, she is also a young and talented member of the Shark Tamers Society. 
Barbie at the Shark Tamers Society picnic in 2009.

     Well, that's all from me today... +__+
     Cheers! Sparkey.

Monday, 4 June 2012

Repairing a broken RAH joint (Roy Mustang: The Saga)

     It was about two weeks ago, and I had a larger amount of money in my account than usual. I had also just arrived home after nearly being creamed by a car when trying to cross the road, so I was in a weakened state... this is when I saw RAH Roy Mustang (from Fullmetal Alchemist) for sale on eBay at an extremely good price. The listing said "Good condition".
     Needless to say, that glut of cash was soon used up...
     About a week later, my nice big parcel arrived in the mail from Japan. When I opened it, Roy looked as if he was, indeed, in very good condition. His outfit is smart and clean, his sculpting is perfect...
     ... but when I removed Roy from the box, there was a nasty surprise waiting for me. There's one thing about Roy which is not in good condition. See if you can tell what it is:
     Of course, this is very subtle. Only a nitpicker like me would notice a little thing like this.
     Totally not something you should mention in an eBay listing.


     Needless to say, I hit the roof maintained my cool.
     After making threats involving PayPal and fire a short conversation with the seller, I negotiated a partial refund.


      Anyway, now to fix Roy.


     Roy is from Medicom Toys' "Real Action Heroes" series (pretty tacky sounding name, but they're nice figures) and they're notoriously pretty touchy. I hear a lot of people asking how to fix them when they invariably have accidents, which is actually what made me decide to start this blog.
     Before I begin, here's a picture of the break (incidentally, the very picture I sent the seller). As you can see, the neck has snapped off at the base:
When I received Roy, his stand had not been opened
and he had some slight damage to the front of his hair.
I'm guessing he fell off a shelf and busted his neck.
     The break wasn't super clean, but it was fairly good, so I first tried to fix it with Supa Glue. That didn't work, and since Supa Glue is the only adhesive I know capable of holding something as small as this together properly, I knew I would have to drill and pin the joint.
     Drilling and pinning is one of the more difficult figure repairs, but if you're up to it, it usually has pretty solid results.
     Here are the tools I used (excluding glue):
From left: Pliers, wire cutters, a tiny screwdriver, 1.25mm diameter wire.
     To drill the joint, you could use a variety of tools. I use a tiny screwdriver but this is dodgy, so I recommend using a pin vice (a little thing which holds a drill bit) and a drill bit the same diameter as your wire.
     For something like this, wire with a diameter between 1 and 1.5 mm is probably best, since it's a pretty small joint.
     Anyway, I used the screwdriver to drill a hole into each half of the broken joint. Each side should be drilled a few millimetres deep.
The neck joint, after drilling. (Yeah, RAH figures are really designed to have clothes on...)
     When drilling, it is tempting to push really hard to make it drill faster, but don't. Even though the joint is already broken, when doing something like this, any pressure you apply runs the risk of breaking other joints too, or even cracking the plastic around the break.
    To make the plastic easier to work with, I warm the neck joint over the heater. PVC is a thermoplastic, meaning it becomes soft when heated. Warming it is advantageous for two reasons:
     1. It's easier to drill because it's softer,
     2. It's less brittle and less likely to snap under the pressure of the drilling.
     You don't want to heat the plastic so much that it looses its shape, so just use a warm hairdryer or a gentle heater for this (at about 100ÂșC, PVC actually melts into a liquid).


     OK, now for the pinning.
   The first thing is to cut a bit of wire just long enough that it fills in the holes you drilled when you fit the joint back together (IE, the length of wire should be equal to the combined lengths of the drilled holes). You might need to fiddle around with this to get the length right.
     Here's a picture of my bit of wire and Roy's head to give an idea of scale:
The wire ended up about 1cm long.
     I probably should have drilled the holes a bit deeper, but the dodgy screwdriver was hard to work with, and the friction/heat of my particular drilling technique was actually enough to start warping the plastic. If this happens, just use a pair of pliers and gently push the joint back into shape before it cools.


     The next thing to do is glue the wire into the joint.
     To find the right adhesive for this, I spent a couple of days mucking around with different types of glue (testing them on old broken Nendoroid joints to see if they worked). After a few duds, I finally came up with something which seemed to do a good job. Since it was hard finding the right glue for this job, I ended up writing a whole article on the subject so that everybody else can learn from my failureshttp://figurefixer.blogspot.com.au/p/more-about-adhesives-glue.html
     I glued the wire into one side of the joint and waited until it was dry before I glued the other side (it's just less difficult that way).
You can see the wire sticking out of the base of Roy's neck.
In the foreground is a small bit of wire – I used it to spread the glue all the way
to the bottom of the hole I drilled.
     After that was done, all that was left to do was glue Roy's head back on and wait.


     ... and wait...
         ... and wait...
             ... and wait...


      Finally this morning, Roy's new neck joint was ready to test!
     I had my doubts about the glue, but it actually worked really well. It's a little spongier than (I assume) it would have been originally, but all the joints still work and Roy can move his neck and head as much as (I think) he ever could.
Medicom Roy Mustang and Barbie get along well.
Roy is back to normal.
     My work here is done! *dramatic pose on top of mountain*


     Good luck with your repairs, everyone!
     Cheers! Sparkey.

Sunday, 3 June 2012

When Good Glue Goes Bad (Woooooo)

     Glue doesn't last forever.
     Once figures are a couple of years old, it's quite common for glued joints to come undone for no apparent reason.
     Luckily, fixing these un-glued joins is probably the simplest repair job your figures will ever need – in fact, you probably don't need to be told how to do this, but I'll write it down anyway.


     Today, I will be fixing Nendoroid Miku, whose neck joint has broken apart.
     Nendoroid neck joints are made of several pieces. There's the obvious peg and the not-so-obvious cylindrical insert which connects the peg to the head.
The cylindrical insert in Miku's neck joint has come out.
     This is pretty easy to fix. The break is clean and close-fitting (and no plastic has been fractured! Yay!), so all I have to do is apply a little Supa Glue and put it back in.
Apply an even coat of Supa Glue (sparingly) all over the unstuck surface.
There is no need to remove the peg from the cylinder, since it is not in the
way and even makes a useful handle! Don't get any glue on the peg.
Now just push the unstuck joint back together, being careful to line it
up properly first. This hardly even needs a picture...
Fixed!
... No need to look so shocked, Miku. I said this would be simple.
     As you can see, the repair is now complete. All that's left to do is put Miku's head in a safe place while the glue dries. According to the packet, this should be in about 24 hours.
     See you tomorrow, Miku!

Supa Glue works even on really tiny areas. I bought Figma Marisa
secondhand and the cup had become detached from her hand. A tiny
bit of glue was all it needed.
     More about Supa Glue:
     Supa Glue is great stuff. It will form really strong bonds with only the most tiny contact area... it will even stick skin together. Plastic surgeons use it instead of stitches sometimes.
     ... oh, speaking of which, don't spill it on yourself... and if you do spill it on yourself, then whatever you do, don't touch it.
     Instead, run it under water straight away.
     It won't form a bond until two surfaces push together (which is why it can only fix breaks which are close-fitting), so if you don't touch it before you wash it off, it'll be fine.
     However, if you put your finger on a glue spot on your arm, an instantaneous, super-strong bond will form between your arm and your finger...
     Another thing to know about Supa Glue is that it can dissolve paint. Well, some kinds of paint, anyway. If you're working with or near a painted figure part, keep this in mind, as it would be a shame to accidentally ruin your figure's paintwork when doing a simple repair like this. If you must put glue on a painted area, try dabbing it on a non-visible area first to see what effect it has.

     If you want more information on glue, such as choosing the right glue for a particular repair, please see my page on adhesives, here!

     Thanks for reading! I hope this has been of help to you!
     Good luck with your repairs!
     Cheers! Sparkey.

UPDATE on RAH ROY MUSTANG'S BROKEN NECK!
The results of my repairs are... inconclusive, because I am still waiting for the glue to dry.
Stay posted to find out what I did to help Roy and whether it actually worked...
"Get on with it!
My arms are really tired!"

Any questions? Just leave a comment and I'll get back to you as soon as I can!

Saturday, 2 June 2012

Hello, Everyone!

Wow! First post in a new blog! I hope I'm popular!
First up, I guess I'll explain what I'm doing here...
As it mentions in my profile, I am an enthusiastic collector of Japanese figures of many shapes and sizes, but, fun as they may be, sadly these little PVC delights are also highly fragile and any figure collector will have had their fair share of breaks. 
Every Nendoroid collector knows this feeling -__-
     Since I'm pretty handy with a tiny screwdriver and I've had a life-long love-affair with adhesives and paint, when I do have a broken figure, you can bet it's not going to be too long before it's fixed and back on my desk, as beautiful as ever. Not everybody has my experience though, and sometimes when your favourite figure is busted, you just want to cry and shove it in the cupboard.
Do not give up on your broken figures! There is almost always a way!
     In this blog I will be trying to help out my fellow collectors by sharing any knowledge of figure repairs and touchups that I have (and maybe writing a couple of reviews while I'm at it – everyone love reviews, right?).
Right now I'm working hard on reattaching Medicom RAH Roy Mustang's broken head (snapped off at the base of the neck).
"Hurry up and fix me! My arms are getting tired!"
                            Stay posted to see how he turns out!
Cheers! Sparkey.